How To Paint The RV Exterior Fiberglass (Like A Pro)!

RV

When you are buying a new or even a second hand RV you probably don’t think very much about the color when there’s an awesome deal at hand.

And of course, that is understandable when there are so many more important factors to consider such as space and comfort and performance. 

However there is no reason why your van shouldn’t also look great too. It might be that your new vehicle comes ready painted in a shade you don’t like. Or perhaps you just feel like a change want to freshen it up after a few years’ wear. Fortunately there is no need to compromise. All you need to do is follow the instruction below and you can be sure to make a great job of painting your RV.

Paint for the exterior (For Fiberglass)

Most RV will have a fiberglass exterior so we are going to focus on paints that are suitable for painting fiberglass. 

It is important to get the right paint for the job. Using a standard all-purpose type of paint will not give you a good finish and it will probably end up costing you more in both time and money to put the job right.

Fiberglass paint comes in a wide range of colors and finishes including matt, gloss and high gloss which should allow you to get exactly the finish you are looking for.

It is always important to read the label on the container to make sure what you buy is right for the job. Look for paints that contain polyester, polyurethane, acrylic or epoxy. These will give you the best results for a tough and weather resistant finish.

What fiberglass paint is the best?
Well first, we highly recommend using a fiberglass cleaner first. The one we recommend is the Dicor fiberglass cleaner (RP-FCP-1).
Why use a fiberglass cleaner before you paint?
It is always a good idea to start with a primer. You might be tempted to skip this step to save time or money, but If the fiberglass roof is not clean the Dicor roof coating will not adhere very well. We recommend using two coats of the Dicor fiberglass roof coating (RP-FRC-1).

It is well worth that little bit of extra effort to ensure the best possible finish. And remember the better job you do now, the longer it will last saving you both time and money in the long run. Primers based on epoxy, latex or urethane are recommended. If possible you should make sure to by the same brand of paint and primer. 

How many gallons of cleaner and paint do I need?

A 40 feet long coach typically takes one gallon of cleaner and two gallon of coating to cover the roof, so it’s important to purchase one extra gallon of the coating product for future touch-up repairs.


Prepping the RV for painting

Getting the right paint is very important but it is only one part of the jigsaw. There are a few more tools and bits and pieces you need to gather together as well as a few important tasks to be done before you start to paint

What You'll Need
  1. Automotive sponge
  2. Soap
  3. A palm sander
  4. Fine grit sandpaper
  5. Denatured alcohol
  6. Painter’s tape

How To Paint RV Exterior Fiberglass

  1. Pick A Good Place To Work!

    It is important to choose a good place to work such as a garage as long as it well ventilated, or your driveway as long as will be out of the sun.
  2. Use Soap & An Automotive Sponge

    Prepare the exterior for painting by giving the whole vehicle good clean using soap and an automotive sponge (you do this before you use the fiberglass cleaner that we recommended up above). Wipe down the exterior of the vehicle so that you remove all mess that has accumulated over the years of travel – You might find there is quite a buildup of dirt and grime and bird dropping especially on the roof.
  3. Palmsander Using Wet Sandpaper

    Next step is to use the palm sander to smooth down the exterior using wet sandpaper with a fine grit. No need to spend hours on this. You are just wanting to create a little bit of surface texture to help the primer and paint adhere better to the surface. In an hour or so you should be able to cover the whole surface area. Don’t waste time going over parts you have already done and don’t spent too much time on one single spot as this will make the final result less even.
  4. Use Denatured Alcohol

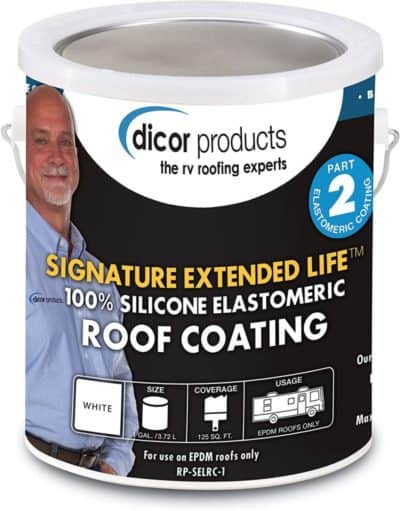
    This One Is By Far The Best! You can get it hereThe final part of the process is to take an old rag and wipe now the whole exterior with denatured alcohol. Denatured alcohol is makes a better job of getting rid any grease still left behind. So always choose denatured alcohol over standard alcohol if possible for this kind of job.
  5. Use Painter's Tape

    Finally cover any parts that need to be protected from the paint with painter’s tape. The windows and windshield are the obvious places. But don’t forget door knobs and any other small details. This will save you from having to paint round them which can be pretty time consuming.

You Are Now Ready To Paint Your RV!

What you will need

  • Latex based primer-or similar
  • Fiberglass paint
  • A paintbrush or a paint gun
  • Acetone

Before you start you need to know how you are going to tackle the actual paint job. Some people prefer to do it by hand. The advantage is that you only need to buy some brushes. Also if you are not confident in using a paint gun it might seem like the simpler option. The disadvantage of hand painting is that it is slower and a lot harder to get a smooth uniform finish. Also you will most likely need to climb on the roof to paint it which can be a bit tricky.

The other option is to use a paint gun. This will allow you to work a lot faster and, assuming you can handle the gun okay, get a nice even and more professional looking finish. If you haven’t used a paint gun before just take a bit of time to experiment and get familiar with it before applying any paint to your vehicle. You can either buy or hire a paint gun depending on what will be most cost effective for you in the long run. 

Before you return a hired paint gun, don’t forget to wipe it down with some acetone to get rid of any leaked paint

Step-by-Step

  1. Starting at the front, apply the primer using your chosen method. You are aiming to cover the whole exterior with a smooth even layer of the product. Give it a few hours to dry – or however long the manufacturer recommends. Always read the manufacturer’s instructions before you start.
  2. Next apply your paint proceeding just as you did for the primer. To keep everything going smoothly, use a long fluid motion. This is the best way to avoid drips. Drips can be more of a problem with a paint gun so paint gun try to keep it all as smooth as possible.
  3. Once again, let the surface paint dry. It will take longer than with the primer. You may have to wait 24 hours and sometimes longer. As always, refer to your manufacturer’s instructions before you start so that you know what to expect. Once the paint is completely dry you can decide if you are happy with the result. If not and you feel that another coat is required simply repeat step 2 above.
Almost Done...

Now you are almost finished and there is just a little more work required to get your vehicle looking fantastic 

What you will need

  • RV wax
  • A soft cloth and a rag
  • Fine sandpaper

Steps

  1. Check over the paintwork for any areas that look a bit uneven. These can be fixed by gently rubbing over them with fine sandpaper.
  2. To get a great shine give the whole exterior it a good polish. Work in a circular motion using a soft cloth and your chosen brand of RV wax. Check the manufacturer’s instructions before you start as some of these waxes need time to cure.
  3. Now it is time to remove all the painter’s tape so that you can see the finished result of all your hard work
Final Words

It might seem like a big job to tackle but as you can see by breaking it down into small steps and being well prepared with the right equipment it is not such a daunting task. And it is well worth the effort to get your vehicle looking just the way you want it especially if you are going in the direction of renting out your RV from RV rental companies to make some extra cash. If you enjoyed our article check out the best RV roof coating on the market, best RV wax, and the best RV wax for fiberglass.